Progressive overload is the fundamental law of muscle growth and strength development. In a traditional gym setting, the process is straightforward: you add more weight to the barbell or pick up a heavier pair of dumbbells. However, when your primary tool is a piece of elastic latex, the path to progression is less obvious.
Many people plateau with resistance bands because they treat them like static weights. To see continuous results, you must understand how to manipulate variable resistance, mechanical advantage, and training density. This guide outlines the specific techniques required to master progressive overload using only resistance bands.
Understanding Variable Resistance
The primary difference between a dumbbell and a resistance band is the "resistance curve." A 10kg dumbbell weighs 10kg at the bottom, middle, and top of a movement. A resistance band, however, provides variable resistance. The further the band is stretched, the higher the tension becomes.
This unique characteristic allows you to match the "strength curve" of your muscles. Most human movements are "ascending," meaning you are stronger at the end of the movement (the lockout) than at the beginning. Resistance bands capitalize on this by becoming heaviest exactly where you are strongest.
To learn more about how different movements interact with your muscles, you can explore our guide on compound vs isolation exercises.
Technique 1: Increasing Band Tension (The "Heavier Weight" Method)
The most direct way to apply progressive overload is to increase the total tension. In band training, this is achieved in three ways:
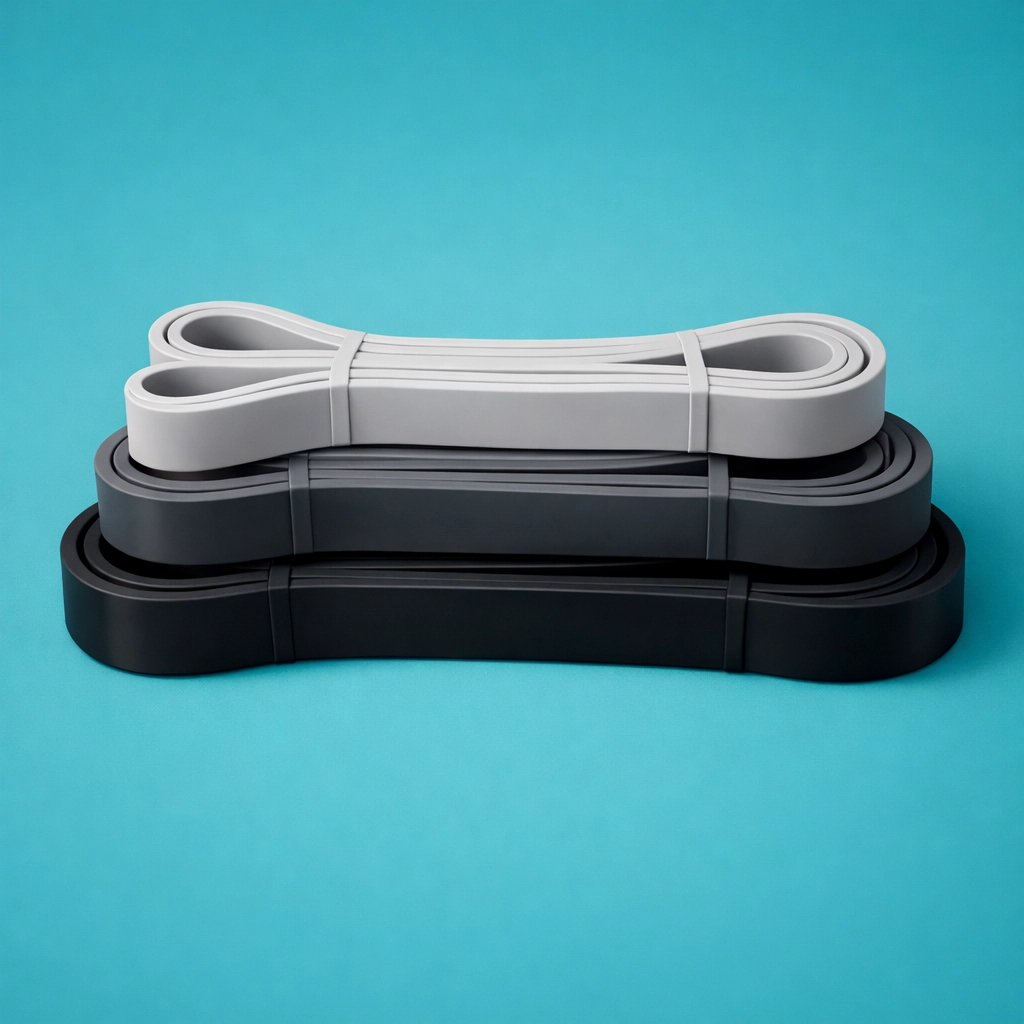
- Switching to a Thicker Band: Most sets come in color-coded levels (e.g., Yellow, Red, Black). Moving from a 15lb-equivalent band to a 30lb-equivalent band is the standard form of progression.
- Band Stacking: You do not have to use one band at a time. If the "Heavy" band is too easy but the "Extra Heavy" is too difficult, you can "stack" a Light and a Medium band together. This allows for smaller, incremental jumps in resistance, similar to adding 1.25kg plates to a bar.
- Shortening the "Live" Band: You can increase the tension of the same band by shortening its starting length. For example, during a standing bicep curl, stepping on the band with a wider stance shortens the amount of elastic available to stretch, forcing it to reach a higher tension level sooner in the movement.
Technique 2: Manipulating Tempo and Time Under Tension (TUT)
Since bands do not rely on gravity, they do not provide the same "momentum" benefits that weights do. You can use this to your advantage by manipulating the speed of your repetitions. To progress without changing your band, try the following tempo protocols:
- The 4-2-1 Tempo: Take 4 seconds to lower the resistance (eccentric), pause for 2 seconds at the point of peak tension (isometric), and take 1 second to perform the contraction (concentric).
- Slow Eccentrics: Focusing on the lowering phase of a movement causes more micro-tears in the muscle fiber, leading to greater hypertrophy.
- Isometric Pauses: Holding the band at full stretch for 3–5 seconds per rep eliminates momentum and forces maximum fiber recruitment.
Increasing Time Under Tension is an excellent way to stimulate growth while keeping the load manageable for your joints. If you find your joints are feeling the strain of increased intensity, supporting them with joint health supplements can be a proactive step in your recovery.
Technique 3: Mechanical Advantage and Positioning
Where you stand or how you anchor the band completely changes the difficulty of an exercise. This is known as manipulating the "lever arm" or "mechanical advantage."
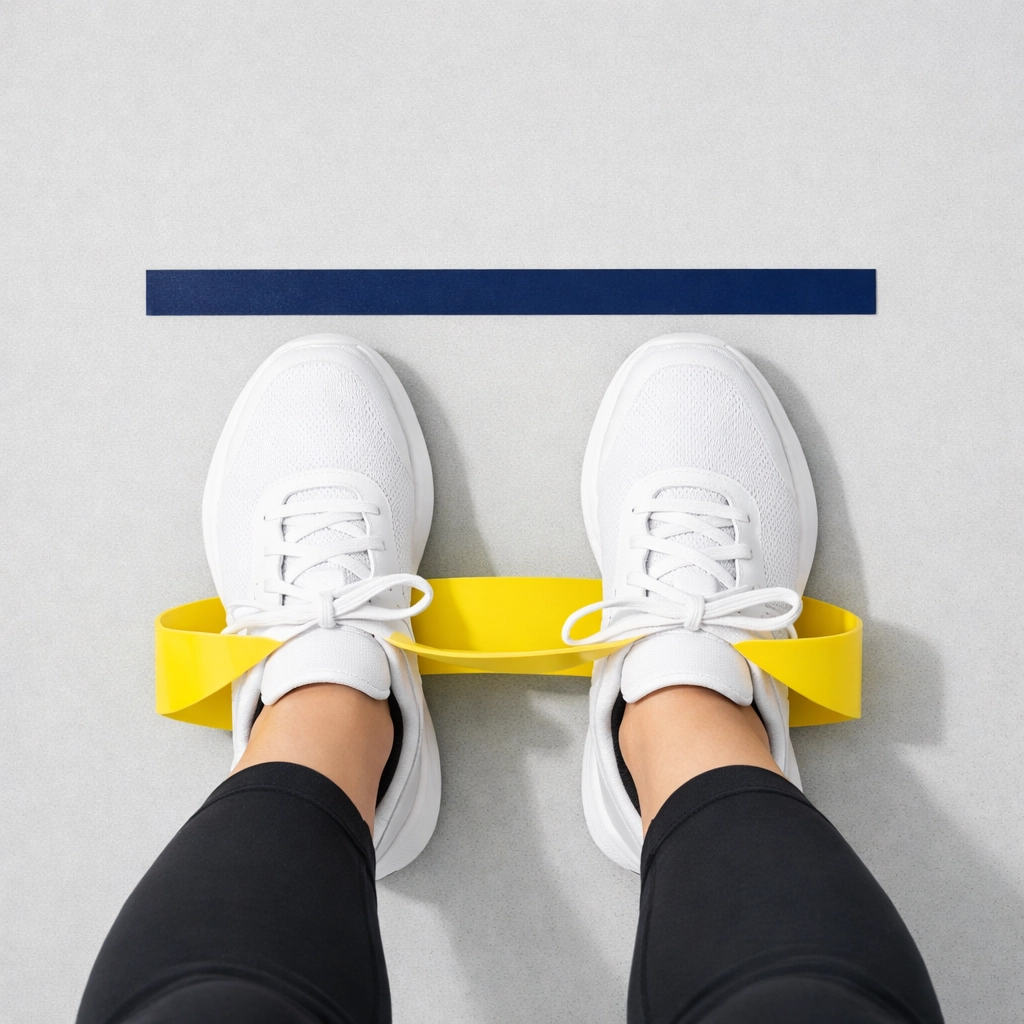
The Anchor Point
If you are performing a chest press with a band anchored to a door, standing six inches further away from the door increases the starting tension. To track this accurately:
- Place a piece of tape on the floor where your feet are positioned.
- Once you can complete your target reps at that distance, move the tape back by two inches.
- This provides a measurable metric for progress that doesn't involve buying new equipment.
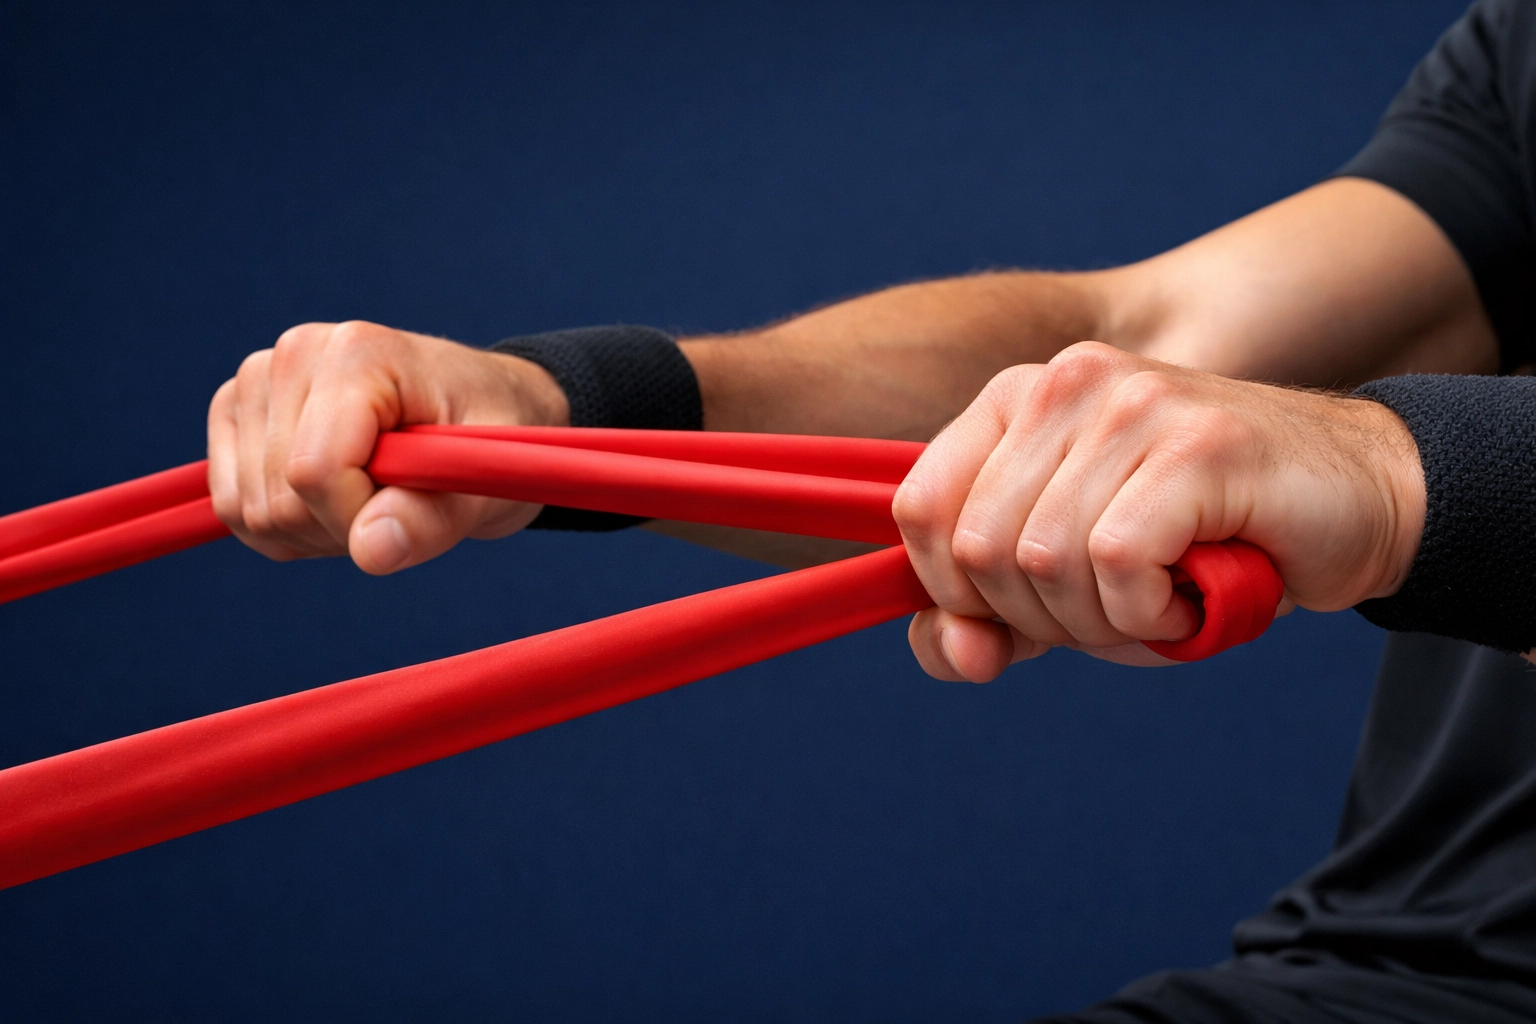
Grip Positioning
Moving your hands closer to the anchor point on a band (choking up) increases the resistance. For movements like the face-pull or row, grabbing the band further down the loop makes the movement significantly harder.
Technique 4: Increasing Training Volume and Density
If you cannot increase the tension, you must increase the work done within a specific timeframe. This is referred to as "training density."
- Repetition Ranges: Aim to increase your repetitions. If you did 3 sets of 12 last week, aim for 3 sets of 15 this week.
- Decreasing Rest Intervals: If you usually rest for 60 seconds between sets, try resting for only 45 seconds. This forces your metabolic systems to adapt and improves your work capacity.
- Frequency: Add an extra training day per week or add a fourth set to your existing exercises.
For those looking to sustain high-intensity sessions with shorter rest periods, maintaining high energy levels through proper nutrition and supplementation is essential.
Technique 5: Increasing Range of Motion (ROM)
Progressive overload can also be achieved by making the movement "longer." A deeper squat or a fuller extension on a tricep press-down requires the muscle to do more work.
With resistance bands, you can often reach ranges of motion that are dangerous with heavy iron. For example, in a band chest fly, you can safely allow the bands to pull your arms slightly further back than you would with heavy dumbbells, increasing the stretch on the pectoral fibers.
Warning: Always ensure your strength and fitness level matches the range of motion you are attempting to avoid injury.
Tracking Progress with Visual Markers
One of the biggest pitfalls in band training is inconsistency. If you step on the band in a different spot every time, you aren't actually tracking progress.
To master progressive overload, you must standardize your setups:
- Count the "Links": If using a chain-style band, always use the same loop.
- Use Floor Markers: As mentioned, use tape or floor tiles to mark foot and anchor positions.
- Log Your Data: Use a notebook or app. Write down: "Red Band + Yellow Band, 3 steps from wall, 12 reps."
The Importance of Recovery in Progressive Overload
Mastering these techniques will put significant stress on your nervous system and muscle tissue. Progressive overload only works if your body can recover from the "overload" you've applied.
- Sleep: Aim for 7-9 hours of quality sleep to allow for tissue repair. You can view our sleep support collection if you struggle with rest.
- Nutrition: Ensure you are consuming enough protein and micro-nutrients. A foundation of vitamins and minerals ensures your metabolic processes are functioning optimally.
- De-load Weeks: Every 4-6 weeks, reduce your tension or volume by 30% to allow your central nervous system to recover.
Summary Checklist for Band Progression
To ensure you are consistently progressing, use this checklist for your next workout:
| Method | How to Apply |
|---|---|
| Tension | Add a second band or move to a thicker one. |
| Distance | Step further away from the anchor point. |
| Tempo | Add a 3-second pause at the peak of the movement. |
| Volume | Perform 2 more repetitions than last session. |
| Density | Reduce your rest time by 10 seconds. |
Resistance bands are not just for warm-ups or rehabilitation. By applying these technical principles of progressive overload, you can build a physique that rivals those built with traditional iron. The key is measurement and intent. If you treat your bands with the same discipline you would a 100kg barbell, the results will follow.
For more tools to support your training journey, visit our best sellers page to see what other athletes are using to optimize their performance.